Tuesday, February 26, 2013

Magnet Display for Craft Show

This post is a little different than the other projects. Earlier I posted on how to make marble magnets and PinSupplies.com also sells the supplies for those. We also have a really cool magnetic paint by Martha Stewart in the store. Using this paint you can turn almost any surface magnetic to be used with your marble magnets. I will be using mine for a craft show display on a shutter.

It's really quite simple. If you know how to paint, you know how to turn surfaces magnetic. It just requires more coats of paint.

I started with this old shutter I found at an estate sale.


I put about three and a half coats of paint on it. I used the whole bottle. I just kept testing the strength of the magnets between coats. I could have made it stronger with more coats but my magnets are super strong so it didn't need to be.
\Then I put a coat of red paint on the whole thing and black chalkboard paint on the top so that I can write prices. I don't have any chalk around so I can't show you how that works but PinSupplies.com also sells this chalkboard paint. 

 Check out all the magnets! I think this will be a nice easy display to fold up and take to craft shows plus it will be a conversation piece of how I got it magnetic.

Think of all the possibilities! 

Another idea is to paint a thin board with both paints and stick in a large picture frame without glass. Then you have a message board you can stick magnets to for notes. 

With the super strong magnets that PinSupplies sells you can also stick 4-6 to the back of a picture frame and it easily attaches to the fridge without falling down. 

Monday, February 25, 2013

How (not) to Make Printed Ribbon

I was put in a pinch today to make a ribbon blanket with New York Jet's ribbon on it. I had tried the photo transfer paper but when I washed the blanket the image separated from the ribbon. On a mission to find a better way I searched Pinterest and the internet.

After many experiments I ended up going back to the photo transfer paper and determined it would hold better if the ribbon wasn't washed for awhile. I am not completely satisfied but it HAD to be done today.

Here are my experiments gone wrong:

I didn't have a problem printing with my inkjet printed onto the ribbon. However I could not get the image to stay on the ribbon without running when it got wet.

In some ways this is a successful tutorial if you don't plan on washing the ribbon or if the colors printed are all black, it just didn't help me today.

Printing on Ribbon

To print on ribbon you start by printing the image on paper.
 Cut your ribbon to size.
 Then tape them down to the paper. Double sided tape is great but I didn't have it on hand so I just did two of the classic tape loops under the ribbon and then taped down the ends so it would feed into the printer nicely.
 Make sure to stick the paper in the same way. Mine is face down with the top to the left. Also adjust your printer settings for the highest quality print. You now have printed ribbon. Wait for it to dry and you can use this in scrapbooking, gifts, and anything else that doesn't get wet. You can see that mine smeared a little on the edges but I only need 3 1/2" sections so I wasn't really concerned about the ends. If you are more careful taping it won't smear.

So how to seal it so it can get wet? The first suggestion I found was to iron it to seal it. This seemed to have a small effect, but not good enough. Then I tried the idea of soaking it in white vinegar.
 This kind of worked, however it pulled out all of the green ink and left it gray, but it is waterproof. A small success! I really wanted some color though. On to the next attempt.
PinSupplies.com sells some fabric Mod Podge that is used to stick fabric to fabric. I thought this would be a brilliant idea since Mod Podge is used to seal so many things. However it was a complete failure. The green ink bled everywhere even when I just blotted it on. I did not try this on the iron sealed ribbon though, so maybe that would work. 
 
This glue is very handy for other fabric projects but unfortunately not this one.
 You can see the green starting to smear here, it got a LOT worse as it dried.

I am rather impatient and needed these ribbons today, but I am curious if I had allowed the ribbon to dry overnight if these methods would have worked. I will have to attempt that tonight for future reference. I would love to be able to print my own washable ribbon.


Thursday, February 21, 2013

Hot Glue Gun Finger Caps

Have you seen this pin on Pinterest?

Well I have found the solution! They are silicone finger caps made by the company that makes Mod Podge. There are 3 in each pack, 2 large and 1 medium. I have burnt my fingers so many times on my hot glue gun that I had to have these as soon as I saw them. Maybe I'm a wimp, but man does that hurt!

You can find them at PinSupplies.com here

Some projects just need to be pushed down with a silicone finger to be smoothed out and these are perfect!

Picture Block Puzzle

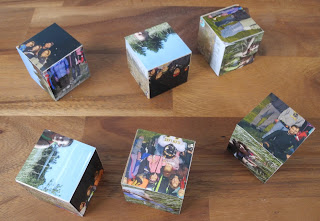
Have you seen these cute block puzzles by Melissa & Doug? My kids love them. How fun would it be to have a puzzle to play with that has their own picture on it? Easy and cheap too.

This puzzle cost $12.99 on Amazon.com while the kit for the picture puzzle costs just $11.50 at PinSupplies.com for 6 wood blocks and an 8 oz container of Mod Podge that will be used on a lot more crafts. Or you can purchase just the blocks for $7.50.  You will need your own 4 x 6 pictures. If you wanted a larger puzzle you could use an 8 x 10" picture and order 20 blocks for $25. This may seem like a lot but it would be a pretty neat puzzle for an older child or as a coffee table gift for an adult.


On to the tutorial:

Collect 6 of your favorite 4x6" pictures. I used color but black & white or sepia would make for a neat antique looking puzzle.
And 6- 2" wood blocks (here).
Carefully trace the block on the back of the pictures. I found the pictures from Shutterfly were slightly too small but still work. The pictures printed at Walmart are the perfect size.

Cut out along the lines with scissors, exacto knife or slicing board.
Apply Mod Podge to each block and apply picture. Make sure you do not put the same picture on any of the same pieces (or you can't finish the puzzle). Seems silly to say this but if you cut all your pictures at once and mix them up it could get confusing, so I suggest one picture at a time.
See the fancy pink mat underneath? This silicone mat is perfect for gluing projects on (especially for the messy crafter like me). The glue rubs off, plus it is floppy and easy to store. You can find it here


After the pictures are on and dried, lightly sand the edges to give it a nice finished flat look. At this point you can also add some distressed ink around the edges. This would look nice with black & white and sepia pictures.


After the glue has dried you need to add a couple layers of Mod Podge on top to make it more durable for kids to play with. Add thin layers at a time and let the glue dry between each layer.


Continue adding each picture until the puzzle is complete. This may take some time to complete because of the drying process, but it is pretty simple and hard to mess up.


HOMEMADE PUZZLES ARE NOT RECOMMENDED FOR CHILDREN UNDER 2 THAT STILL PUT TOYS IN THEIR MOUTHS. I CAN NOT GUARANTEE THAT DRIED MOD PODGE IS SAFE TO EAT SO PLEASE JUST USE WITH OLDER CHILDREN.

You can also buy and download these cute people and make interchangeable block dolls.


Wednesday, February 13, 2013

Lotion Bars

This is a great recipe for winter time. My hands got really dry this year and were peeling a lot, but after I started using these lotion bars they got way better. They seem greasy at first but they really do work and you know exactly what you are putting on your skin because there only 3 basic ingredients. I found this recipe at Nurseryofthenation after seeing it on Pinterest.

You want to start with equal parts of Beeswax, Shea Butter and Coconut oil. (All found at PinSupplies.com)


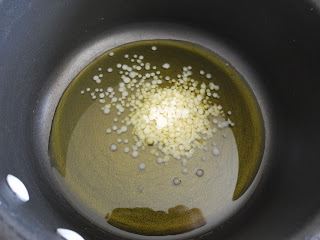
Melt the beeswax and oil in a pan. Some like to use a double boiler or even a crockpot but I used my old saucepan that I only use for wax. I set it on low heat and it only takes a few minutes to melt.


Add the shea butter and stir until that is melted down. Remove from heat and add your fragrance oil if you want.

 Pour into a silicone mold. I use my silicone mold for a lot of things so it is a little stained. We used it last year to melt down broken crayons and give as Valentines to the 1st graders (another Pinterest project).
After about 1/2 hour to an hour the bars will harden and can be removed. You could package these up in a tin or plastic bag with ribbon and give as a gift.


Valentines day is coming up, wouldn't these make great gifts for Teachers?


Homemade Vicks

Vapor Shower Discs

I found this great recipe for discs that dissolve in the shower and give off the same aroma as Vicks does. They sound like a fabulous idea for the next time I am congested. Here is the original recipe: Homemade Vicks Vapor Shower Discs

Add 1 cup baking soda to mixing bowl.
Slowly add enough water to form a thick paste, about 1/3 cup.

Add 15 drops each of Eucalyptus, Rosemary and Lavender Essential Oils.
Pour into cupcake wrappers. I highly suggest using the silicone pans. It is a lot easier to remove them from the silicone. Let them dry for 12-18 hours. You can also bake them at 350 degrees for 20 minutes to speed the process up, but they are not as pretty that way.

 Ingredients:
1 cup baking soda
1/3 cup water
15 drops Eucalyptus Essential oil
15 drops Rosemary Essential oil
15 drops Lavender Essential oil

All of these oils can be found in Vapor Rub and Disc Kit at PinSupplies.com. You can use the same essential oils to make you own Vicks vapor rub too.

Vicks Vapor Rub


Add 1/4 cup virgin olive oil and 2 tsp Beeswax pellets to pan. Heat on low heat until wax is melted.


Remove from heat and add 30 drops Eucalyptus, 25 drops Rosemary and 15 drops Lavender.

Pour into 4 oz jar and allow to cool about 1/2 hour. It will harden and become a nice rub for the next time you need your sinuses cleared out.

Ingredients:
1/4 cup virgin olive oil
2 tsp yellow beeswax pellets
30 drops Eucalyptus Essential oil
25 drop Rosemary Essential oil
15 drops Lavender Essential oil


These ingredients are not recommended to be used on children under 2, pregnant or nursing moms or anyone that may be allergic to lavender, eucalyptus or rosemary.

I am not a doctor, so do not use these products if you have a medical condition. Contact your doctor first.

You can find the original recipe for the Vicks Vapor rub at this site: mrshappyhomemaker. Of course I found these recipe using Pinterest and all ingredients can be found at PinSupplies.com


Sunday, February 10, 2013

Felt Balls are in!


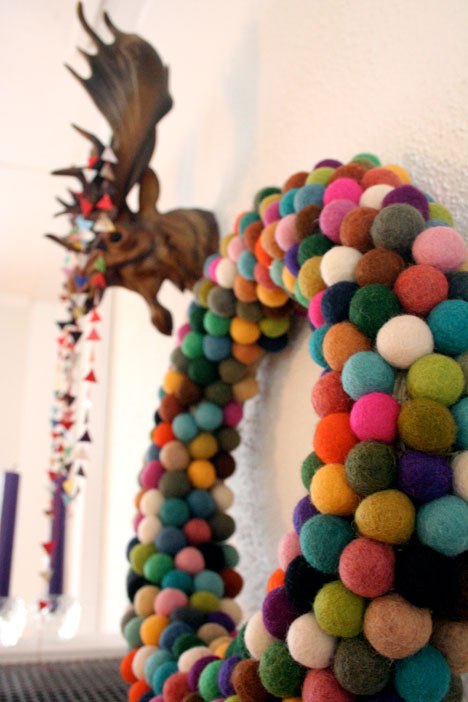
We now have in stock 29 different colors of 2 cm felt balls and assorted 1 cm balls. What are these for you ask?

Well check out all these awesome crafts you can make with them. I can't wait to try a felt ball wreath. Even though Christmas is over it will still be hung in my house. 

Do a quick search on Pinterest for felt balls and you will see that their is huge a crafting market for these babies. They are not easy to make in large quantities though and they take weeks to ship in from Nepal but we will ship them out right away from PinSupplies.com

From Holiday HowTo
Holiday HowTo: DIY Felt Ball Wreath


Felt Ball Rug

Crate and Barrel was selling this for Christmas, but I'm going to try to make it myself this year. Felt ball garland looks very country charming for Christmas decorations.
Felt Ball Garland